

ASSEMBLY INSTRUCTIONS

Assembly of the central structure of the Pole Stage
ONCE YOU HAVE DECIDED WHERE THE POLE WILL BE PLACED, UNFOLD THE LEGS OUT.


Insert a bolt into the innermost hole on the central element of the structure. Repeat for the other five innermost holes.
Hand-screw a flanged hexagonal nut onto the bolt as far as it will go without tightening. Repeat for all six bolts.


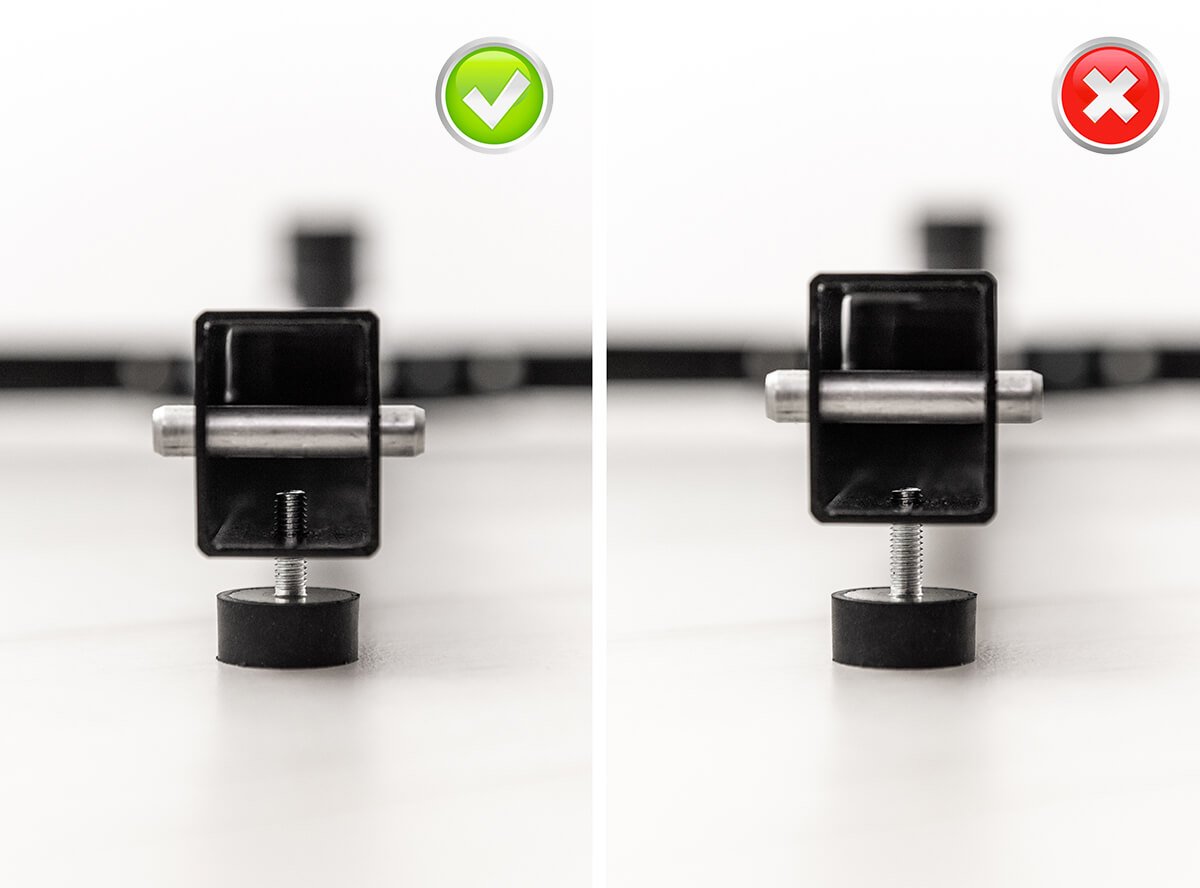
ADJUST THE FEET (this is important for the stability of the podium)
Adjust the feet on the central structure in order to render the surface of the podium perfectly horizontal and to raise the central element of the structure off the ground in order to guarantee increased stability.

ASSEMBLE THE SIX WOODEN TRIANGLES
Position a wooden triangle on the podium structure making sure that it is properly fitted into place.
Check that the point of the triangle slides under the collar of the central element of the structure.
Repeat the previous two operations for all the podium triangles, making sure that they fit together properly, forming a single compact surface.


TIGHTEN THE FIXING RING FOR THE WOODEN SECTIONS
Insert the fixing ring for the wooden sections into the central element of the podium.
Turn the ring clockwise making sure that it slots into the relative groove on the tips of the wooden sections, until it is fully tightened.
CHECK THAT THE PODIUM TOP HAS BEEN INSTALLED CORRECTLY
1. Use a spirit level to ensure that the surface is horizontal.
2. If the surface is not horizontal, use the feet to adjust inclination, as always ensuring that not too much thread is exposed


FITTING THE POLE INTO THE PODIUM TOP
Take the previously assembled pole with both hands, position it perpendicular to the central hole of the podium and insert it.

SWITCHING THE POLE FROM SPIN TO STATIC WITH QUICKSPIN
No tools are required for this operation.
In order to switch the pole from SPIN to STATIC and vice-versa, simply lower or raise the Quickspin Ring until it clicks into place.
STATIC POLE: Lower the Quickspin Ring
SPINNING POLE: Raise the Quickspin Ring

OPTIONAL FUNCTION: LOCKING THE QUICKSPIN SYSTEM
This is an optional function that allows the QuickSpin system to be locked into one of the two modes (SPIN or STATIC), thus impeding the passage from spin to static with a click. If the QuickSpin locking function is not required, do not insert the steel cone-point grub screw.
For this optional function, use the steel cone-point grub screw and the 4-mm hex key.
1. Locking Quickspin in the spin position: raise the Quickspin ring, insert the steel grub screw into the hole on the ring and tighten fully with the 4-mm hex key. Unscrew and remove the grub screw in order to free the Quickspin.
2. Locking Quickspin in the static position: lower the Quickspin ring, insert the steel grub screw into the hole on the ring and tighten fully with the 4-mm hex key. Unscrew and remove the grub screw in order to free the Quickspin.

Do not touch the screw indicated in the figure.
This screw regulates the operation of the QuickSpin and is adjusted during the production of the pole, if this screw is tampered with, the QuickSpin will no longer remain in the spin position and you will have to contact technical assistance.
DISMANTLING THE STAGE POLE
REMOVING THE POLE FROM THE PODIUM STRUCTURE:
Grip the pole with both hands and lift it until the steel pin has been completely removed from the central hole in the podium structure. Place the pole on the ground, making sure not to damage it, or on the dedicated Pole Rack.

DIVISION OF THE TWO POLE SECTIONS
To better transport the pole, you can divide it into two sections:
Lay the pole in a horizontal position before beginning.
1° Using the 5-mm hex key, rotate the pin in the upper section for 3.5 turns.
2° Turn the pole until you see the two small silver pins, then use the hex key to push the pin that you have just unscrewed inwards.
3° Separate the sections by pulling them gently apart.
ATTENTION: DO NOT TURN THE HEX KEY TOO FAR IN A COUNTERCLOCKWISE DIRECTION, OTHERWISE THE STEEL THREADED BOLT WILL MOVE TOO FAR IN THE OPPOSITE DIRECTION, ONCE AGAIN LOCKING THE JOINT.
IF THIS HAPPENS, TURN THE STEEL THREADED BOLT CLOCKWISE AS FAR AS IT WILL GO USING THE 5-MM HEX KEY, AND THEN TURN IT COUNTERCLOCKWISE FOR JUST 3 COMPLETE TURNS.
REMOVING THE WOODEN SECTIONS FROM THE PODIUM STRUCTURE:
1. Turn the wooden section fixing ring counterclockwise to raise it.
Carefully remove the wooden sections making sure not to drop or damage them.

FOLDING THE CENTRAL STRUCTURE OF THE PODIUM
1. Unscrew the 6 hexagonal nuts from the 6 safety bolts (those closest to the central element) and remove them.
2. Fold the six black square-section tubular pieces towards the centre of the structure.


FOLLOW-ALONG STEP BY STEP SETUP VIDEO
Follow-Along Setup Pole Video